

Your basket is empty
Already have an account? Log in to check out faster.
Your basket
Your basket is empty
Already have an account? Log in to check out faster.

What if your first artisan loaf doesn’t need perfect timing or fancy gear, just a willingness to read the dough? Artisan bread baking for beginners can sound full of mysterious terms and tricky techniques, but a wonky-looking dough isn’t automatically a failed loaf. Bread has a few ideas of its own.
If you’re unsure where to start, you’re in good company. The basics are simpler than they seem, and learning what to look for can take the guesswork out of each step. This guide explains the ingredients and stages, walks you through a manageable first loaf, and shows you which visual cues matter more than the clock.
You’ll also learn what a dense, flat or uneven loaf can tell you, so each bake becomes useful practice. Sourdough is one delicious example, but artisan bread comes in many forms. Ready to roll up your sleeves and get to know your dough?
Artisan bread is shaped by hands-on choices, from mixing and fermentation to shaping and baking. There’s no single crust, flour or recipe that earns the label. The appeal is in the craft: a simple dough develops its own character, so loaves can vary in shape, crumb and crust. For more on hearth-baked bread, see Hearth Bread: A Foundation of Artisan Baking.
Start with four building blocks. Flour gives the dough structure; water brings it together and helps form gluten, the stretchy network that holds gas. Salt adds flavour and helps regulate fermentation. Leavening creates lift: baker’s yeast is a convenient, measured option, while sourdough starter is a flour-and-water culture that ferments dough and brings its own tang. Sourdough is one path, not the whole bread basket.
For artisan bread baking for beginners, choose one reliable beginner recipe and follow its ingredient amounts and sequence closely. Flour absorbs water differently, so your dough may feel stickier or firmer than expected. Notice its texture, but resist changing several things at once. Adding flour by handfuls can make it difficult to judge whether the dough needs more time or just a different handling technique.
A mixing bowl, clean work surface and dough scraper are useful basics. A digital kitchen scale helps you measure consistently. Specialist gear can wait: a banneton supports shaped dough during proofing, and a Dutch oven can help trap steam, but neither is essential for your first loaf. Pay attention to whether the dough is shaggy, stretchy, puffy or holding its shape. Those cues matter more than a cupboard full of kit.
If you’d rather practise with guidance, the Bread Foundation Class for Beginners teaches bread-making fundamentals through hands-on instruction. Either way, keep the first bake simple. You’re building feel as much as following a formula, and that’s where the good dough begins.
Think of your first loaf as a sequence of small decisions, not a race against the clock. Follow your recipe’s quantities and baking instructions, then let the dough’s look and feel guide you. The Bread Bakers Guild of America: Supporting Artisan Baking also highlights the value of learning and community in the craft.
Expansion, structure and feel tell a more useful story than timing alone. Warm, humid conditions can make dough ferment faster and feel stickier, so check it regularly and handle it with lightly damp hands if needed. If it’s moving slowly, give it more time. If it’s moving quickly, continue to the next stage once the recipe’s cues are met. Guided practice in the Bread Foundation Class for Beginners helps you build confidence as you learn these hands-on cues.
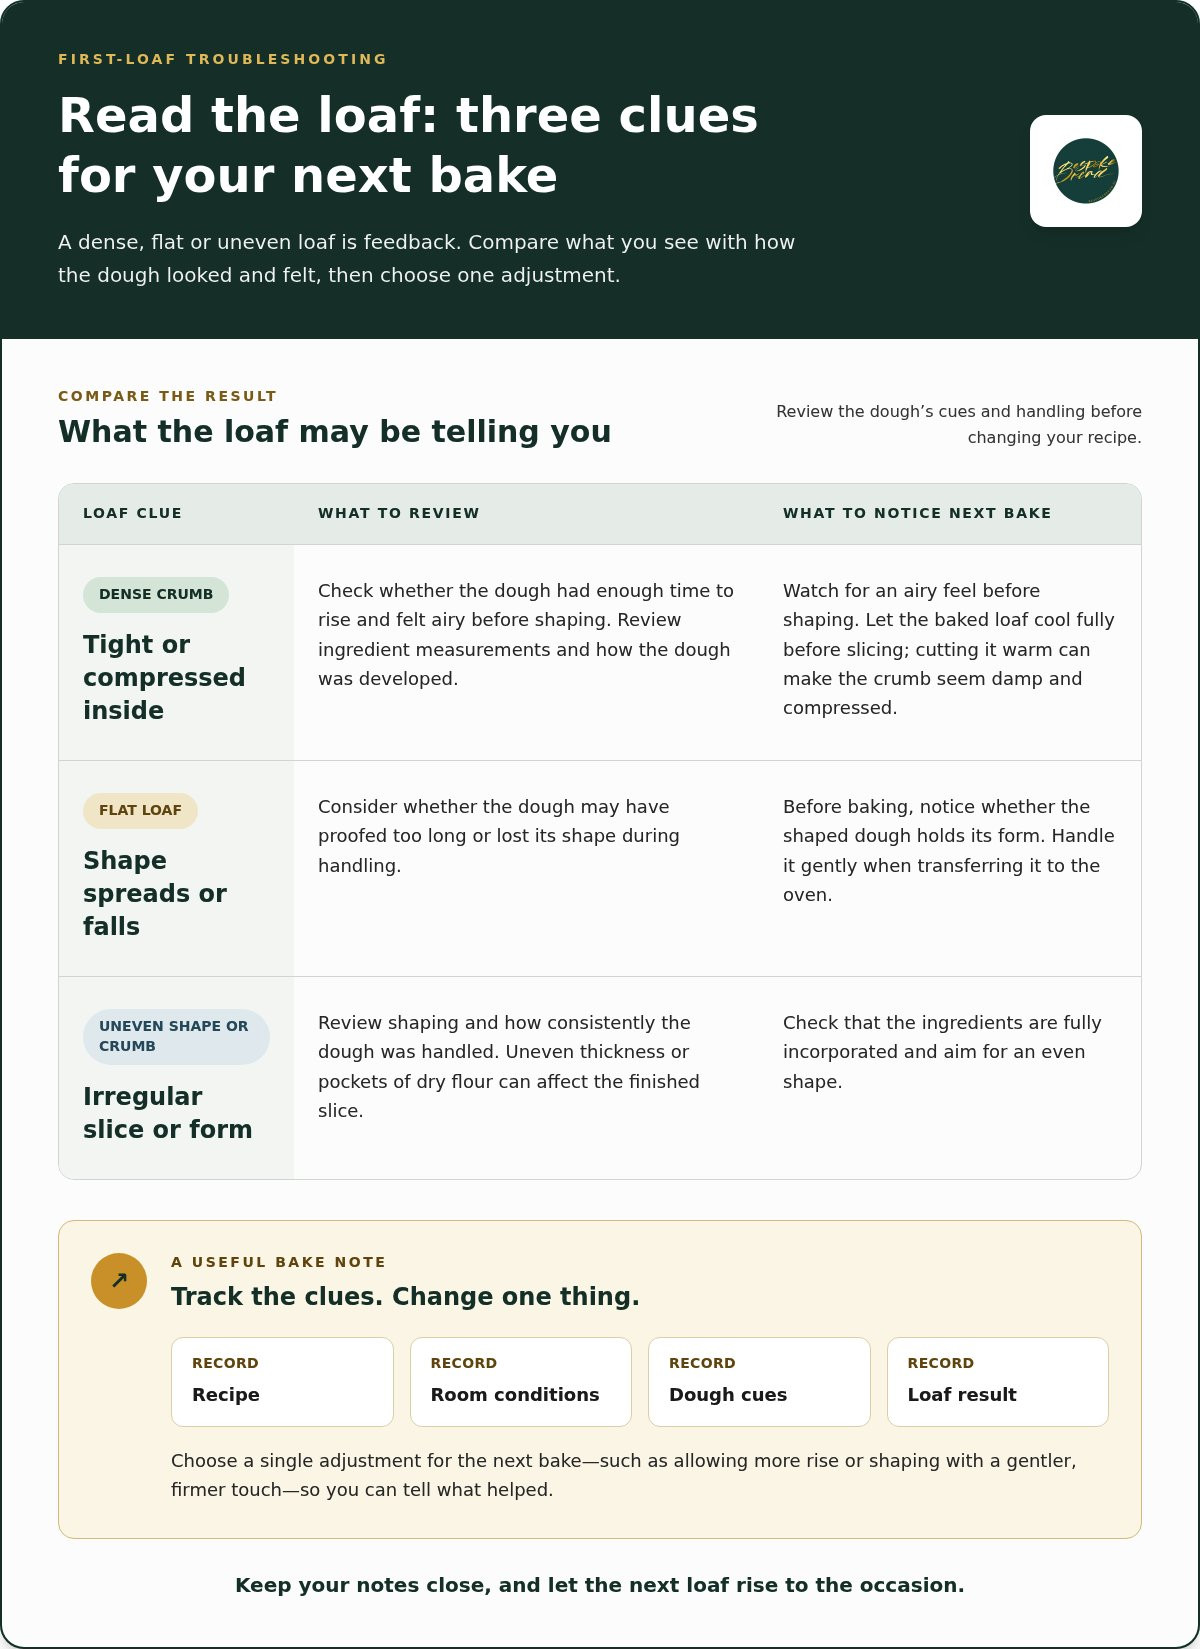
A dense, flat or uneven loaf isn’t a verdict on your baking skills. It’s feedback with a crust. In artisan bread baking for beginners, treat each result as a clue: compare what happened with how the dough looked and felt at each stage, then choose one adjustment for your next bake.
Keep a simple bake note: record the recipe, room conditions, dough cues and result. Change just one thing next time, such as allowing more rise or shaping with a gentler, firmer touch. That way, you can tell which adjustment helped instead of changing the whole recipe at once.
If dough handling or shaping still feels like guesswork, live feedback can help you see what your hands are doing and troubleshoot while you practise. For a structured introduction to sourdough, the Sourdough Baking Class - Fundamentals offers guided, hands-on learning. Use each bake, at home or with an instructor, to sharpen your eye and trust your touch. Keep at it, and you’ll be on a roll.
Your first loaf is a starting point, not a final exam. Keep experimenting, notice what changes from bake to bake, and let your confidence rise along with the dough. That’s the real joy of artisan bread baking for beginners: each attempt teaches you something new, even when the loaf turns out differently than planned.
If you’d enjoy learning with expert guidance, Bespoke Bread’s one-day beginner baking classes offer hands-on practice, materials, ingredients, troubleshooting tips and lifetime support for home baking. Explore Bespoke Bread’s hands-on baking classes and take your next step from curious baker to confident dough-hand.
Keep your notes, trust your senses and give yourself room to grow. Your bread-making journey is just getting its yeast legs, so let your next loaf rise to the occasion.
Yes, a standard oven and basic kitchen tools are enough to begin. Choose a recipe written for a home oven and a baking tray, rather than one that assumes a baking stone or Dutch oven. A kitchen scale can help you repeat measurements accurately, but you don’t need a cupboard full of specialist gear to try artisan bread baking for beginners.
A dense loaf can result from limited rise, dough that hasn’t developed enough structure, or cutting into the bread before it has cooled. Look at the crumb: a tight texture throughout suggests a different issue from a damp, compressed strip near the base. On your next bake, let the loaf cool fully before slicing so you can assess its texture more clearly.
Yes, humidity and kitchen temperature can affect how dough feels and ferments. A recipe that behaves differently in an air-conditioned kitchen than near a warm window isn’t necessarily going wrong. Note where the dough rested and how it changed. If it repeatedly feels unusually slack, adjust the recipe cautiously on a future bake rather than adding extra flour by handfuls.
No. Artisan describes an approach to making bread, not one required leavening method. A loaf raised with baker’s yeast can be made with care and shaped by hand, just like a sourdough loaf. Focaccia and other handmade breads can also reflect artisan techniques. Try different styles and notice how their ingredients and shaping create distinct textures and flavours.
0 comments